I just got back from Creativation 2018, which was held this year in Pheonix, AZ. Besides the great Seminars and Workshops … there is the mind-blowing, sensory overload trade show exhibit floor! I look forward to getting my hands on some cool craft products that I saw this past weekend (most of the new products should be out by Spring), but what I love most about walking the massive area filled with make and takes and vendors … scoping out
“What can I stamp on?”
I usually find something at this event that I either haven’t tried stamping on or haven’t been successful with stamping on … and this year’s show did not disappoint!
One word… GLASS!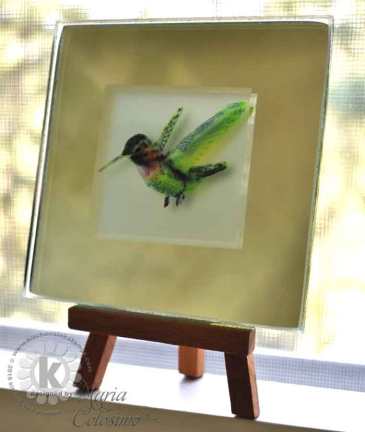
Multi-Step Hummingbird Clear Stamps on etched glass.
I have tried multi-step stamping on glass and mirror and it never turned out. Yes, I used Stazon and other alcohol inks, but I don’t care for what they do to clear stamps and not thrilled with the outcome when layering inks … the stamp slides around and doesn’t leave a great impression after the first layer of ink.
Solution: Etch the glass or mirror first!
I have done some etching before and my experience with it was messy, smelly and highly TOXIC… which could be all the reasons why it never occurred to me that I might have better luck multi-step stamping on glass or mirror if I etched an area first!
Then I stumbled across a table that was doing a make and take with glass etching … and they weren’t in gloves (or hazmat suits – lol)! I had to see exactly how much etching they would be doing?
I was totally impressed with the ease the “make and takers” at the table were encountering with the glass etching product, but when the demonstrator said, “… Just pour the leftover back into the jar. It is reusable!” WHAT!!!?? I gave my friend Traci (who joined me in Pheonix) a look and she saw the smoke coming from my brain! She knew I wasn’t leaving until I could try out this product for myself and see if I could stamp on it! LOL!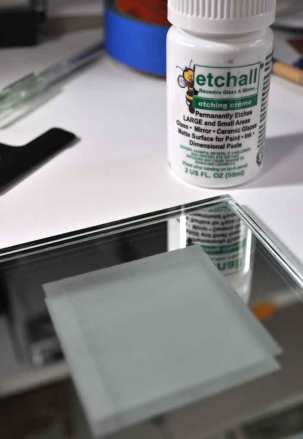
After taking in a ton of etching tips and ideas from the demonstrator, Lyndia, (maybe that was the owner’s name? Barbara is the owner), and her assistants (they were all awesome!!!), it was our turn to sit down and try this awesome etching cream, Etchall. Of course, we had to be difficult! “No thank you”, when offered the prepared hummingbird stencil/mask they had for everyone trying the product … “Nope, we just want to etch a square, thank you.” After seeing the confused looks on all of their faces, we told them why.
“Finally! We have some stampers!”, beamed the lady doing the demonstration (I was so engrossed with all the demos I forgot to look at anyone’s names!). They seemed just as thrilled as we were to give etching and stamping try, especially when I told them it was for multi-step stamping and that meant layers of ink.
The photo right above is the mirrored square that I etched at the make and take. This etching cream truly was easy to use! No gloves, no smell and used very little because the rest went back into the bottle. Got to LOVE that!
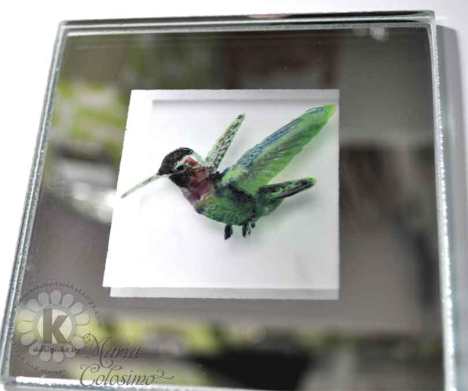
It is a bit hard to tell in the photo at the top of my post, but that is the same piece of etched mirror that is in the close-up photo below. (photographing mirror isn’t as easy as paper! lol) The top photo shows how the light bounces off the mirror and the colors “light up”. The bottom photo shows the detail of the stamps.
I am REALLY happy with how this multi-step stamping experiment turned out!
What do you think: Have you ever stamped on etched glass or mirror? Would you ever want too? I would love to know your experiences (failures and successes)!
Thanks for stopping by and
please check out the cozy winter scene card from Lynn McAuley.
Stamps: Multi Step Hummingbirds Clear Stamps from Kitchen Sink Stamps.
Inks: (all Palette (P) & VersaFine (VF) Inks as noted)
- Hummingbird: (Head) Step #1a – Chartreuse (P) and add Cognac (P) to the beak only, Step #2a – Beaux Arts Blue (P), Step #3a – Onyx Blak (VF).
- (Body) Step #4a – Chartreuse (P), Step #5a – Viridian Leaf (P), Step #6a – Prussian Blue, Step 7a – Onyx Black (VF), Step #8a L’Amore Red (P) head near the eye and again with Violete (P) fill in the neck.
Other Supplies: Mirror, painters tape and Etchall (which I have come to learn can be found at Hobby Lobby and Amazon! – Where have I been?)

The hummingbird turned out great! 🙂
LikeLike
Thanks Patti!
LikeLike
Gorgeous!
LikeLike
Thank you Stacey!
LikeLike
Who knew? Love the results.
LikeLike
Thank you Sue! I am so happy to have a way of stamping on glass!
LikeLike
This is a great project! What type of ink did you use on the hummingbird? Thanks for sharing a wonderful idea! I want to give this a try now.
LikeLike
Thank you K Kopp! I used Palette and VersaFine inks. I list each of the colors I used and for each step at the bottom of the post.
LikeLike
Thank you! I will be giving this a try.
LikeLike
You are welcome! Would love to know how it goes for you when you get a chance to try it out. Cheers!
LikeLike
That is just soooo awesome !! I’ve alre heard about this Etchall or something similar for an electronic cutting machine. And I love the look of etched glass so much. So fun !! Thanks for sharing !
LikeLike
Thank you, Marjorie! I was really impressed by how easy Etchall was to use including the cleanup. What really sold me on trying out Etchall? The safety factor! No gloves or toxic odors!
LikeLiked by 1 person
Sure ! That’s definitely extremely important ! Thanks again !
LikeLike
Wow, beautiful piece of art!
LikeLike
Thank you, Kristy, for the lovely comment!
LikeLike
Absolute Beautiful… Beautifully written… Thank you for sharing..
LikeLike